2 Use of the product - MM v4.13.0
This chapter will explain in details the functionalities of Digizuite™ Media Manager.
2.1 Type of users
A Digizuite™ DAM system has its own database of users that is created by the Digizuite™ DAM Center admins. Each user is set up with a username, a password and role-based access rights.
There are 4 types of users within the Media Manager: guest, member, contributor and administrator.
2.1.1 Guest
Media Manager is available for guest users (user, who are not logged-in) in a read-only mode. The guest users can only view assets that are made available for public users when uploading.
Guest users can search for public files, preview them, download them and share them on social media if this is allowed. For the ability to add to favorites, they will be requested to login if they possess membership credentials.
2.1.2 Member
Members are set up with a login. They can use the site's content and view assets that are restricted from the guest user, but they are not able to change or add anything within the Media Manager.
2.1.3 Contributor
Contributors are users who share the same functionality as members do, but in addition they are allowed to upload and manage their own assets.
2.1.4 Admin
Admins are super users who possess the same rights as members and contributors. In addition they are allowed to change the settings of Media Manager as it will be described in this document.
In general, the role of each user is only a matter of the access rights that are set up from the Digizuite™ DAM Center.
2.2 Digizuite™ Media Manager Interface
2.2.1 Log in
In the section Type of users, you got familiarized with the different kind of users who can access the system. Besides the Guest user, any other user, is required to log in to the Media Manager (if the Media Manager is configured to ask for login credentials). In order to do this, you have to access the Media Manger via any of the compatible browsers and devices mentioned in Chapter 1 - Digizuite™ Media Manager Requirements.
 Pressing the button in the right upper corner, will open the Log in box.
- Username – insert the username provided to you by the local administrator
- Password – insert the password provided to you by the local administrator
 Remember Login Info – choose between Yes or No
Once the correct information is filled in, press to sign in to the system.
Note: If the inserted Username and/or Password are incorrect, you will get and error. In case the error persists, please check:
- Your email and follow the activation link
- That the user has been approved inside Digizuite DAM Center.
 Note: Depending on how the system is configured, you can change the language of the Media Manager by pressing in the lower right corner.
2.2.2 Sign up
 If you are restricted from viewing the content, you can Sign Up for an account. When the login box is shown, simply press on the Sign Up button and fill in the required information.
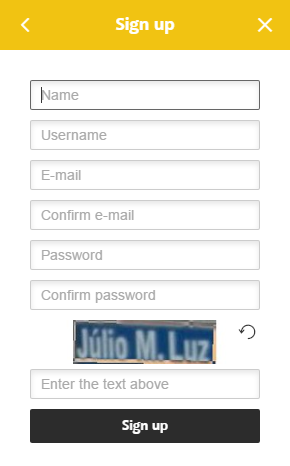
- Name – enter your full name
- Username – enter your desired username
- E-mail – add your email
- Confirm e-mail – re-enter your email
- Password – select your desired password
- Confirm password – re-enter the selected password
- Enter the text above – in order to validate the request, you need to confirm the Captcha code
Once you have filled in the required fields, press Sign Up. A success message shows up if you have provided the right information.
Note: If the Name, Username or Email have already been registered inside the Digizuite™ DAM Center, you will get an error.
There are 3 possible sign in scenarios:
- No verification – you sign up and you are ready to work with Media Manager
- Email verification – you have to access the link send to your email in order to activate your user
- Admin verification – the Digizuite™ DAM Center administrator will have to approve the user
Note: The Digizuite™ DAM Center administrator can enable/disable the Sign Up functionality by navigating to System tools → Config → Digizuite Media Manager, select the correct version and navigate to Config parameters tab.
2.2.3 Digizuite™ Media Manager Home Screen
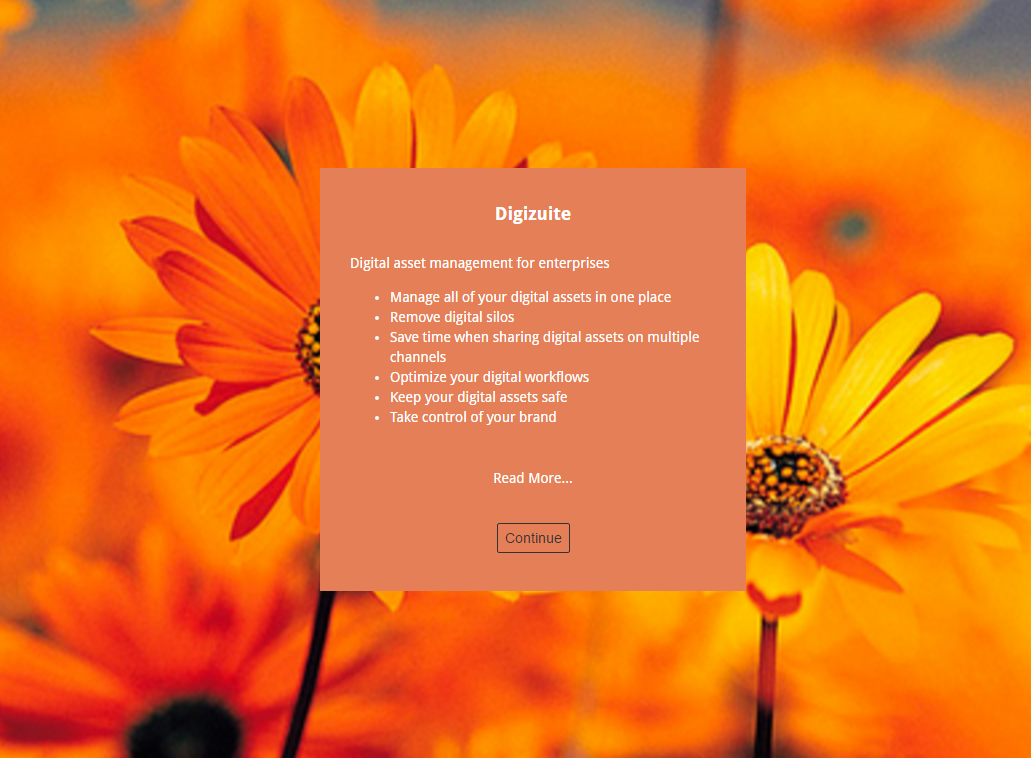
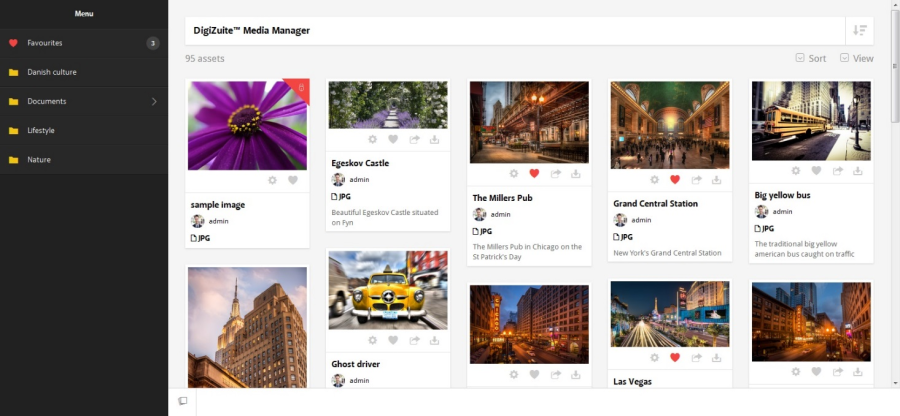
Once the Log in is successful, you are redirected to the start screen of the Media Manager.

The above image is showing the start screen. This is the main page from where you can preview assets, search and access several other functions.
2.2.3.1 Top bar

The top bar contains the logo of your company and the user's profile menu represented by the user's profile picture and name.
2.2.3.2 Menu bar

The menu bar contains 6 buttons that give you access to various functionalities of the Media Manager:
| The Menu button opens the menu giving you access to a well-defined structure of folders and subfolders that may contain all types of assets. |
| The Start button will redirect you to the home screen. |
| The Admin button opens the configuration panel of the Media Manager. From here you can edit the Start screen. |
| The Upload button redirects you to the upload page. From here you can upload a new asset and edit the associated metadata. |
| Adding metadata to an asset helps you do a much better and effective search. Using the filtering options, you can take advantage of the facet search. |
| Collections will help you to easily manage the content and store the most important assets into different collections. |


2.2.3.3 Assets
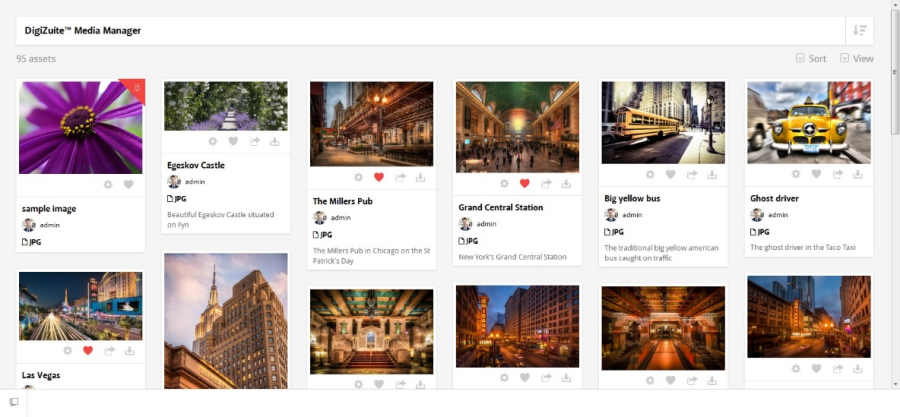
In the Asset section you will find any uploaded asset. From here, you have access to various functionalities such as Edit, Favorite, Share and Download. You will find more information about this in the following chapters.
2.2.3.4 Menu structure
The Menu button will give you access to all your configured folders and subfolders.
All the assets within the Media Manager are structured in folders for an excellent overview and an easy and clean search.
Each folder can contain an endless number of subfolders. If you see an arrow in the right side of the folder name, it means that the selected folder is organized in one or more subfolders.
 In the Menu panel, you can also visualize your favorite assets. Press the My Favourites button to view the assets that are favorited by you.
For a better overview you can also change the way items are displayed as following:
 – Sorts the assets based on first letter or date.
 – Displays the assets in three different ways: Gallery, Box or List view
Note: If Media Manager is configured to sort by Favorites, it will first show the assets that are favorited by all the users.
2.2.3.5 Asset manager
From the Start page you can manage your available assets.
2.2.3.5.1 Toolbar
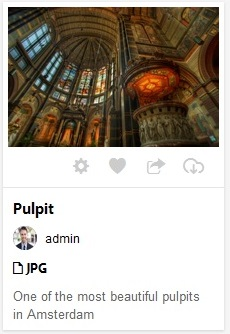
Edit metadata
Pressing on the cog icon, will open the metadata editor. From the editor you can configure the metadata associated to the selected assets.
You can choose to remove the asset as well. Deleting an asset will remove the asset from Media Manager only.
Note: You need edit rights for the asset in order to access the editor.
Note: The replace and restore functionality will change the source asset, meaning that previews and other derived material will change globally throughout all channels. The functionality will not have any impact on the metadata.
Favorite
Pressing on the heart icon will mark the asset as favorite. The asset will be visible right away in the Favorites menu.
Note: The heart will turn red if the asset is favorited.
Share
The sharing functionality is in a strong relation with the Collections. You have multiple ways of sharing an asset:
- File(s)
- Collection – you can share an asset or multiple assets through a collection. You are asked to create a new collection and afterwards you can share the collection with internal or external users.
- Package (.ZIP) – you can share an asset or multiple assets as a .ZIP package. You are asked to select the desired qualities and afterwards share it with internal or external users. The user receives an email with a download link.
Note: You can insert multiple email addresses by using the semicolon ( ; ).
- Social – you can share the asset or multiple assets on any of the available social media (Facebook, Twitter, LinkedIn or Google Plus).
- Add to collection – you can add an asset or multiple assets to an available collection.
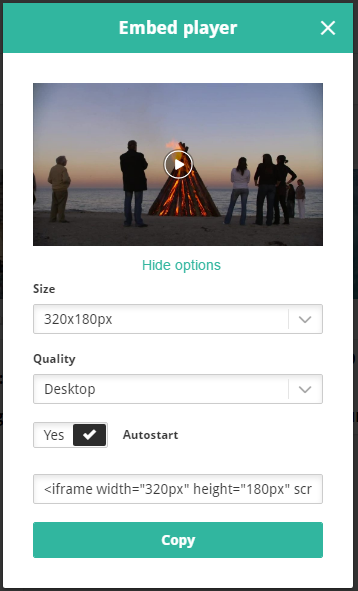
- Embed player - you can embed a video using multiple options
- Size - choose the size of the embed player
- Quality - choose the quality of the video
- Autostart - select whether you want the video to start automatically or not
- Size - choose the size of the embed player
Download
You can instantly download an asset in one of the predefined qualities.
Note: If the selected asset is an image you can download a Custom image. Once the custom image is ready for download, you will receive an email with a download link.
Note: If an asset is set to not public; you cannot share or download the selected asset. To make the asset public or not public navigate to Edit this metadata → General → All asset types.
2.2.3.5.2 Multi-select
From the asset manager you can select multiple assets and use the same functionalities as mentioned above:
- Edit metadata
- Favorite
- Share
- Download
Note: If you select multiple assets and one or more of them are not available for sharing or download, you will be notified that some of the selected items cannot be downloaded or shared.
Note: When you select multiple assets and press Download, a new Quality selector panel will be available.
How to multi-select:
- Choose your assets using your mouse
- Use Ctrl + click
- Use Shift + click
- Use the checkmarks available under each asset.
- Note: the checkmarks are only visible if you have selected at least one asset or you have enabled the multi-select toolbar.
2.2.3.5.3 Previewing an asset
In order to preview an asset, simply press on the thumbnail of the asset and you are redirected to the landing page of the asset.
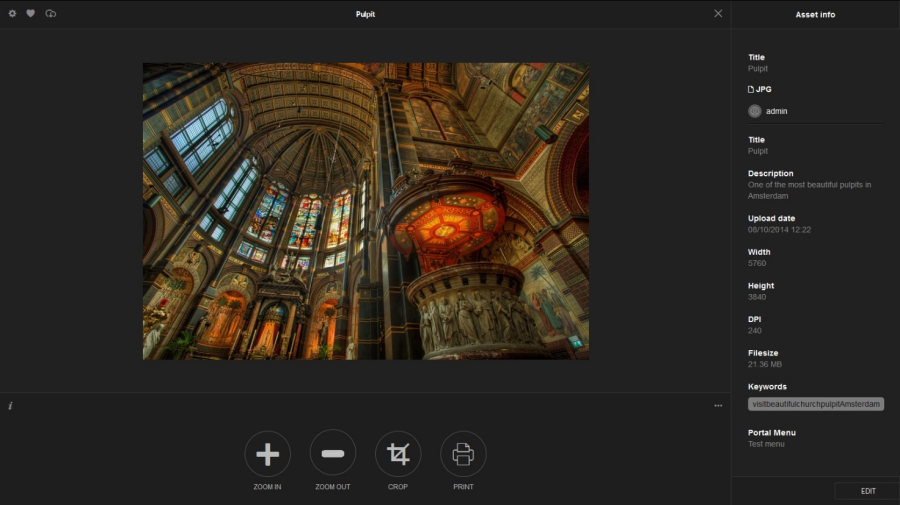
When previewing an asset:
- You can open the metadata in read only view by pressing on the i icon in the bottom left corner
- From here you can print the metadata by clicking print asset metadata
- You can open the tools available for the selected asset by pressing on the three dots icon in the bottom right corner
- From here you can print the asset if it's either an image or pdf.
- From here you can crop the image and have the result emailed to yourself or someone else.
- You can Edit metadata, Favorite or Download the asset in the top left corner
- You can exit the preview mode by pressing on the cross icon in the top right corner
2.2.3.6 Admin
In the administration panel, you can configure the start screen of your Media Manager.
Note: Only a user with admin rights have access to the admin's panel.
2.2.3.6.1 Start screen configuration
You have two options for customizing the Start screen of Media Manager. You can either insert a video that will play in a loop before logging in, or you can insert a static image.
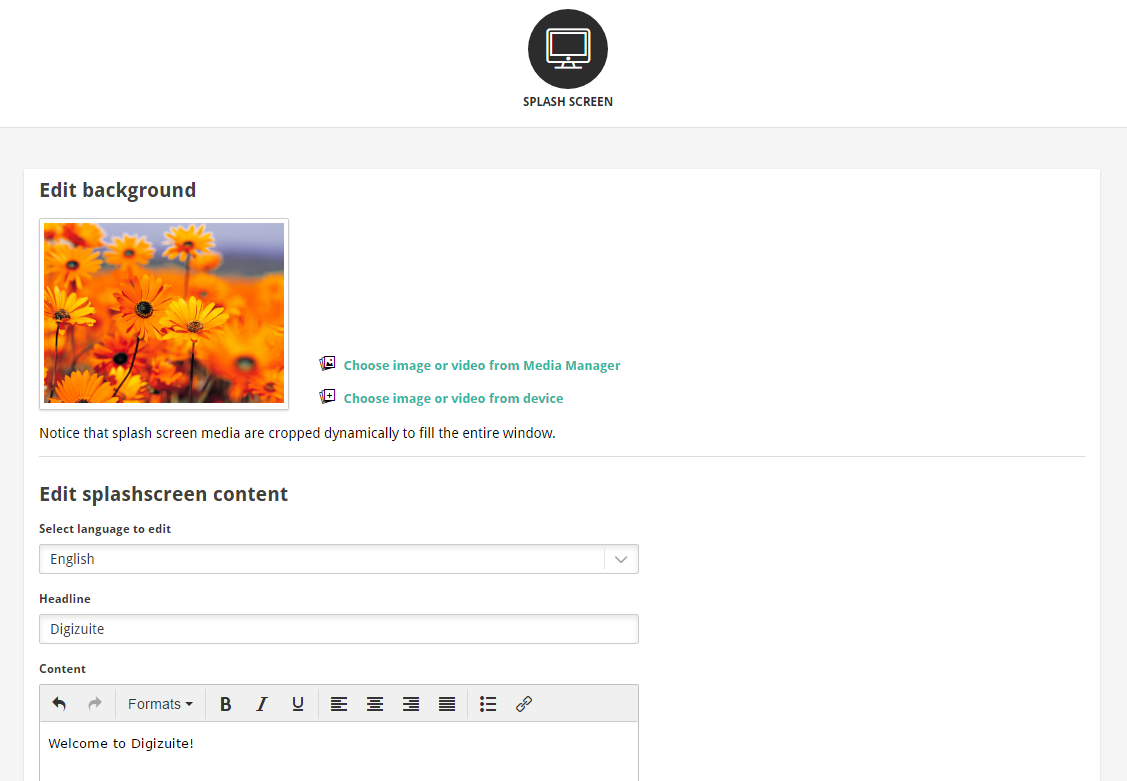
| Press this button and you will open the image/video selector. Select the desired asset. |
| Press this button and upload an image/video from your local computer. |


Further on, the following options can be visible:
- Select language to edit - Select the language in which you want to edit the Headline and the Content
- Headline - Insert the title to be visible on the splash screen
- Content - Insert the content to be visible on the splash screen
- Choose splashscreen color - Select the color to be used on the splash screen
Example:
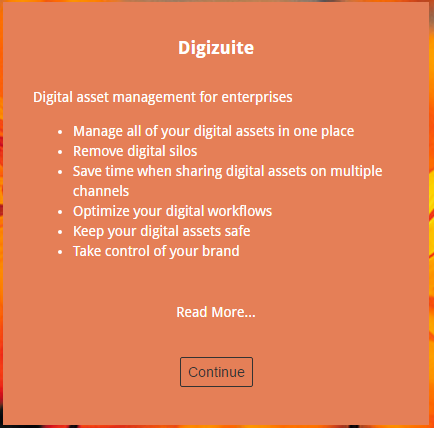
Note: We recommend using images that are at least 1200px wide. The splash screen media is being cropped dynamically to fill the entire window.
Note: The current version removes the existing start screen before the new image/video is ready. This means that the background will be empty (white) in the processing time. Therefore, we recommend you to upload a video to the Media Manager as a personal asset before adding it to the start screen. Return afterwards to the start screen configuration and pick your video for the start screen directly from Media Manager. This way, the interference with the overall experience will be minimal.
2.2.3.7 Upload
The Upload section is available for the following user types: Contributor and Admin. Digizuite™ Media Manager offers different ways of uploading assets.
In the Upload section you can access three different submenus:
- Upload files – where you upload your assets
- Task manager – where you get an overview of the assets in the uploading process and are available for editing the metadata.
- Upload history – where you can see your upload history.
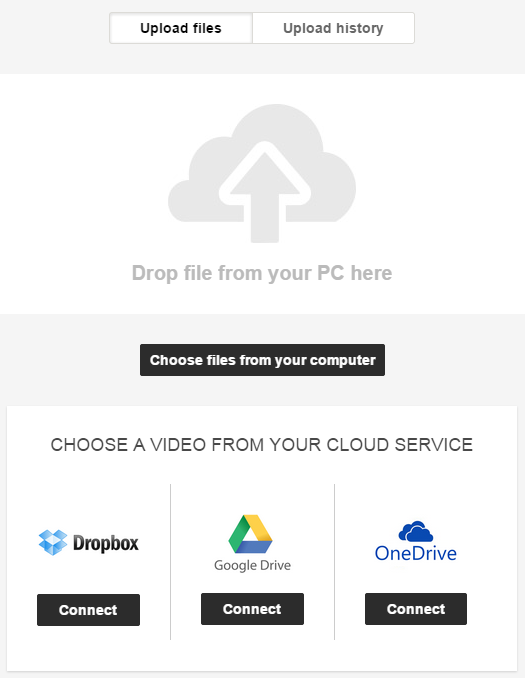
You can upload assets from your desktop or by connecting to one of the 3 cloud services: Dropbox, Google Drive or OneDrive.
2.2.3.7.1 Upload files
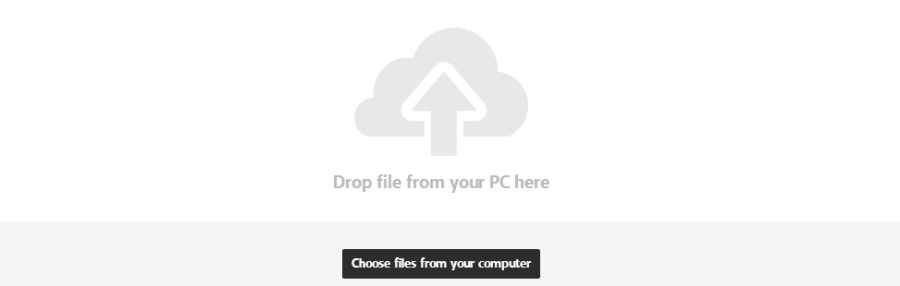
Desktop upload
When it comes to desktop upload you have two options for uploading your files:
- Drop files from you PC into the highlighted area. Drag and drop your files and the uploading process will start right away.
- Choose files from your computer. Press this button and it will open up your Windows Explorer for Windows users or the Finder for Mac users.
Dropbox upload
Press Connect and a pop-up window will appear asking you for your Dropbox account login credentials. Once you are successfully logged in, select the desired files and upload them to Media Manager.
Google Drive upload
Press Connect and a pop-up window will appear asking you for your Google drive account login credentials. Once you are successfully logged in, select the desired files and upload them to Media Manager.
OneDrive upload
Press Connect and a pop-up window will appear asking you for your OneDrive account login credentials. Once you are successfully logged in, select the desired files and upload them to Media Manager.
Note: No matter the path you choose for uploading, you will be redirected to the Task Manager section for further metadata editing of the asset.
2.2.3.7.2 Task manager
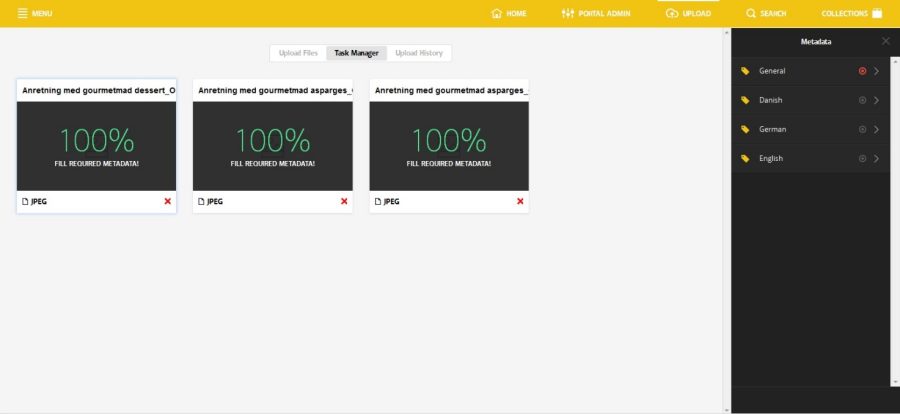
The above image represents the Task manager and it is showing the interface that helps you setting up the metadata.
The first thing you will notice on the page, are the loading bars that appears immediately you are uploading an asset.
Note: The asset will not be visible for anyone unless you edit the metadata. There are three colors for each state of the metadata:
- Red – metadata is required
- Grey – metadata is not required
- Green – required metadata has been completed and saved
You can change the Title and Description in different languages or you can continue editing the metadata available under General.
Note: When the upload is completed, a thumbnail will be generated and shown. For Images and Videos, the thumbnail will be generated faster than any other asset type.
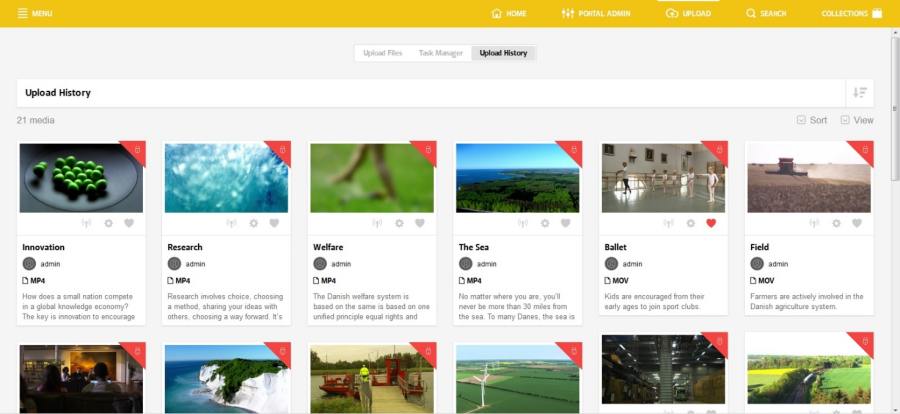
2.2.3.7.3 Upload History
In the Upload History page you can see all the uploaded assets.
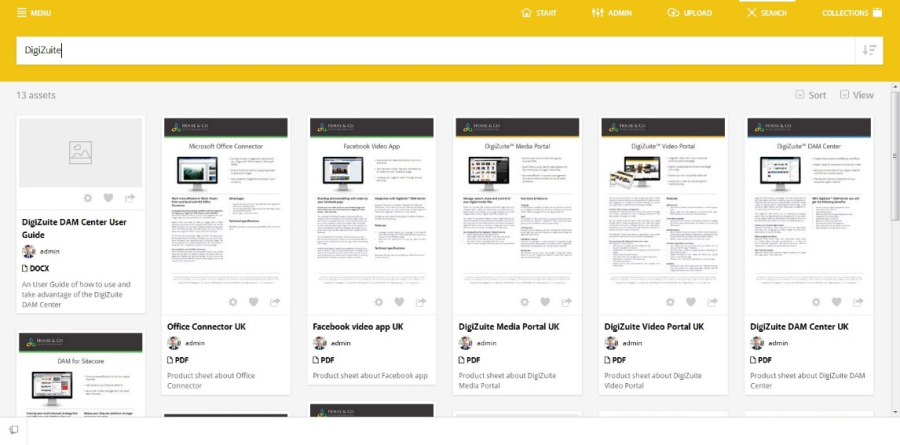
2.2.3.8 Search functionality
Media Manager comes with a live search and filtering functionality. Every time you start searching for an asset, it will automatically show suggestions based on the text inserted. The filtering panel also updates with the right filters based on your search.
Example: If at the beginning of the search you had all asset types available under Asset type filter, after searching for a title, you could have only Images available under Asset type filter.
2.2.3.9 Collections
Collections are individual. You can have an unlimited number of collections. Rename, delete, share or download a collection anytime it is necessary.
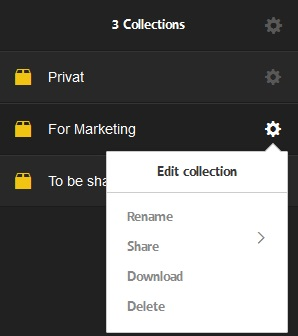
- Pressing on the up & down arrow icon in the right side of your collection will let you rearrange your collections using drag and drop.
- Pressing on the cog icon will open the drop down menu with the following options:
- Rename – rename the collection
- Share – share the collection
- Download – download the collection
- Delete – delete the collection
Note: You can only share collections created by yourself.
2.2.3.10 Profile
Every user of Digizuite™ Media Manager is entitled to update his or hers profile information.
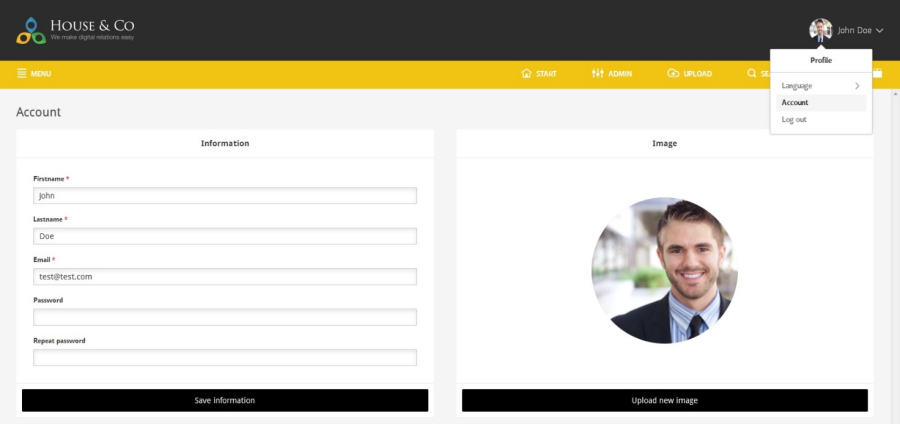
On any page the image and the name of the logged in user are situated in the right upper corner, if you press on the circle, a drop down menu gives you three possibilities to choose from:
- Language – change the language of the portal
- Account – update your profile
- Log out – log out from media manager.
Table of Contents